How to Keep Lionel Train Tracks Together
Seven steps to straighten, tighten, and clean old rails
Email Newsletter
Get the newest photos, videos, stories and more.
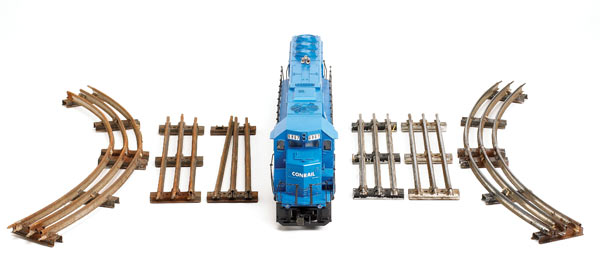
Let's say you've got a ton of old Lionel track in your basement, or maybe someone is willing to give you a bunch for nothing. You want to build a layout, so you figure you can use this track to do it economically.
However, when you get a closer look at the O or O-27 steel tubular track, doubt starts to seep in – much like the moisture that has rusted the track. An even closer inspection reveals that this track is also very much "used." Track pins are missing or loose, and rails are misshapen.
Everyone tells you not to bother with the track because you will have nothing but headaches if you use it on your layout. But can it be effectively refurbished?
First, sort through your pile and objectively examine each piece. Don't waste your time with the pieces that are too far gone. This includes track that is heavily corroded, severely bent, or badly crushed. You can't save it all.
But if you have track sections that have mild rust, tarnish, or other distortions, you can make them useful again. Here's my seven-step approach, which applies equally well for O or O-27 track.
Click on any picture for a larger image.
TOOLS AND MATERIALS
The following tools range from easy to difficult to find. In addition, not all tools of a similar name work for this application. For example, there is an alternative style of hose-clamp pliers that looks quite different and won't work at all when trying to straighten old track. When in doubt, have a piece of track on hand before you buy any tools in a store. The recommended versions (if any) and tool specifications are listed below.
• Hose-clamp pliers – We recommend a pair made by eHobbyTools.com. Other models may be available in auto parts stores, hardware stores, farm supply stores, and home centers.
• Needlenose pliers – Numerous models, available in hardware stores and home centers. Use a medium-sized tool that fits the track you're using.
• Diagonal cutting pliers – Numerous models, available in hardware stores and home improvement centers. Size isn't critical, as long as the jaws fit between the rails. Ehobbytools.com carries a tool called track pliers (no. 10100) that has a crimping nib to tighten pins on Standard gauge, O-27, and O gauge track.
• Abrasive cleaning pads – 3M Scotch-Brite heavy-duty scour pads (recommended), available in many grocery stores, discount department stores, hardware stores, and home centers. Similar brands are available, but never use steel wool instead.
• Lionel replacement track pins – O gauge no. 65551 or O-27 no. 65042, available at toy train hobby dealers.
Step 1
Remove loose or rusted pins. Good pins should fit tightly and not turn freely in their holes. If you must remove all three pins on a single section of track, put a Magic Marker line on the underside of that end of the track section. This will indicate which end of the section has the factory rail crimps that hold the pins in place. Pull the pins straight out so that you don't distort the hole. Note the shape of the holes and compare them with properly shaped holes on a new section of track.
Step 2
Make sure that the track is straight. In many cases, the track may have a bent end on one or more of the rails, the result of someone pulling the track apart by bending it side to side instead of pulling it straight out. (Note the extreme example on the outside rail above.) If the rail is slightly bent, there's a tool you can use to straighten it. Hose clamp pliers, typically used for applying Omega-shaped spring wire clamps onto rubber hoses, just happen to work perfectly. (See the "Tools and materials" box on this page.)
The pliers' jaws has a cavity that, coincidentally, fits nicely around the contour of a tubular rail. The hole in the pliers' tip allows you to grab the rail on end without crushing the hollow-tube railhead. Just grab the bent rail with the pliers as shown – with the wide-flanged rail base remaining outside the tool's jaws – and gently bend the rail back into position.
Step 3
Once the rail ends are straight, you need to restore their contours. Using needlenose pliers, squeeze the middle part of the rail back together as shown. If any of the three tubular railheads is badly misshapen, you're better off discarding this piece of track than trying to reshape the hole.
The reshaped rail ends should now look something like this when viewed from the end.
Step 4
Now you need to crimp both ends of each section of track to properly secure the pins, which should be firmly fastened to keep them from turning in their holes. First, locate the end of the track that has the factory crimps (as you may have marked in Step 1). The factory crimp should be visible on both sides, appearing as small round depressions about 3⁄8 inch from the end of the rail, like the pristine example in this picture.
Especially if you had to remove any of the three pins on this end, you'll need to re-crimp each rail at the same spot as the factory crimp. A good crimping tool is a pair of diagonal cutting pliers – preferably an old pair that is no longer sharp, thus reducing your chances of cutting through the rail. You only need to crimp the rail hard enough to grab a track pin tightly.
The opposite non-pin end of the track needs to be crimped as well. I crimp the opposite end of track about 1⁄4 inch from the end, again using diagonal cutting pliers. You may want to practice crimping some track that you are going to throw away to get a feel for the job.
Step 5
Next, make sure the foot of each rail is tightly fastened to the track ties. The two outer rails again use a factory crimp. For these rails, use your diagonal cutting pliers to squeeze the outside crimp visible on the tie tab that covers the rail base.
To tighten the center rail, use your needlenose pliers to push downward on the paired locking tabs that hold the insulator, rail, and track tie together. Spread the pliers' jaws far enough to avoid squeezing the rail itself.
Step 6
You can clean the track in several ways, depending on how much cleaning is necessary. Because some old track has been used on ballasted layouts in the past, you may find a thin layer of white glue hiding beneath the railheads. To remove this glue, use a chisel-type hobby knife blade (as shown here) or bend a thin piece of metal so that you can easily reach under the railhead. The glue should pop off the metal as you lightly wedge the blade into the glue joint.
Next, clean the surface rust from the rails using a cleaning pad and some soapy water. Since the track is zinc plated to protect the steel rail from corrosion, you don't want to remove any more plating than is already worn off. Scotch-Brite pads (made by 3M) strike a good compromise in providing enough abrasion to quickly remove surface rust without scratching the metal. Don't use steel wool, which, besides being more abrasive, can leave residue strands that could end up inside locomotive mechanisms.
To prevent rust from re-forming, immediately dry your freshly cleaned track with a towel and bake it in an oven at 200 degrees for an hour or so.
Step 7
Finally, inspect the track pins. If they aren't too badly corroded, clean any visible rust using Scotch-Brite pads and water. You can simply hold the pin with a pair of pliers while you're cleaning it (a slower, safer method), or you can put each pin in a drill chuck and apply power while keeping the cleaning pad wrapped around the pin.
If a pin is badly corroded, replace it with a new one. In either case, reinstall pins by tapping them into place – if the pins can be easily pushed in with your fingers, the crimps you made earlier aren't deep enough. You'll need to re-crimp, as described in Step 4. After tapping them in place, try to turn the pins with your fingers. They shouldn't spin at all.
ADDITIONAL TIPS
After all your work, it would be a shame if you let your track sections deteriorate again. There are several things you can do to prevent track problems.
First, if you plan on storing your refurbished track for a while, I recommend that you wipe the tracks down with lightweight machine oil, like 3-in-1 Oil or sewing machine oil. The oil provides a protective coating against rust. After installing your track, you can clean the railheads with alcohol or a track cleaning lubricant.
Don't keep the track in plastic bags, which can trap moisture. Obviously, keep the track out of damp areas, such as your basement, or you'll probably be doing some more refurbishing.
When you're ready to install the track, clean the old oil off the railheads and anyplace where you may need to make a solder connection. Then, before permanently installing any of the pieces, absolutely test the track to make sure the center-rail insulation that prevents shorts is still viable. You may want to press down on the center rail a bit to mimic the weight of a passing train, just to make sure.
It's certainly possible, even after all your hard work, that a few pieces of refurbished track will never make it to your layout. But I'm sure you'll be happier safe than sorry. And you still can't beat the price.
How to Keep Lionel Train Tracks Together
Source: https://www.trains.com/ctt/how-to/restoration-repair/recycle-old-lionel-track/
0 Response to "How to Keep Lionel Train Tracks Together"
Post a Comment